
Dometic Penguin II: Low Profile, High Capacity RV AC & Heat Pump
Share
Dometic Penguin II RV Air Conditioner: The Complete Guide & Review
1. Introduction
When summer heat transforms your RV into an uncomfortable mobile oven, having a reliable air conditioning system isn't a luxury—it's a necessity. The Dometic Penguin II stands as the leading low-profile RV air conditioner, combining powerful cooling performance with aerodynamic design that reduces drag during travel. For RV enthusiasts who demand both comfort and efficiency, selecting the right air conditioning system represents one of the most critical decisions affecting their mobile lifestyle.
The importance of choosing an appropriate RV air conditioner extends beyond simple temperature control. Your AC selection influences fuel efficiency through aerodynamic impact, affects available electrical capacity for other systems, determines noise levels that impact sleep quality and conversation comfort, and ultimately shapes your overall camping experience. A poorly chosen unit leads to insufficient cooling, excessive energy consumption, and frustration that can ruin otherwise perfect adventures.
The Dometic Penguin II RV air conditioner addresses these concerns through thoughtful engineering that balances performance with practical considerations. Whether you're weekend camping in state parks, full-timing across the country, or seeking remote boondocking locations, understanding this system's capabilities helps you make informed decisions about your climate control needs.
2. Product Overview: Technical Specifications
Cooling Capacity and BTU Ratings
The Dometic Penguin II line offers multiple configurations to match diverse RV sizes and cooling requirements. The standard 13,500 BTU model provides powerful cooling for most travel trailers and smaller motorhomes, while maintaining a compact footprint that preserves roof space. For larger rigs or those camping in extreme heat climates, 15,000 BTU high-capacity models deliver additional cooling power without compromising the system's low-profile advantages.
Understanding BTU requirements for your specific RV prevents both under-sizing that leaves you uncomfortable and over-sizing that wastes money and electrical capacity. As a general guideline, calculate approximately 20-25 BTUs per square foot of interior space for adequate cooling in hot climates. A 300-square-foot travel trailer requires roughly 6,000-7,500 BTUs minimum, making the 13,500 BTU Penguin II more than sufficient with generous headroom for extreme conditions.
Physical Dimensions and Weight
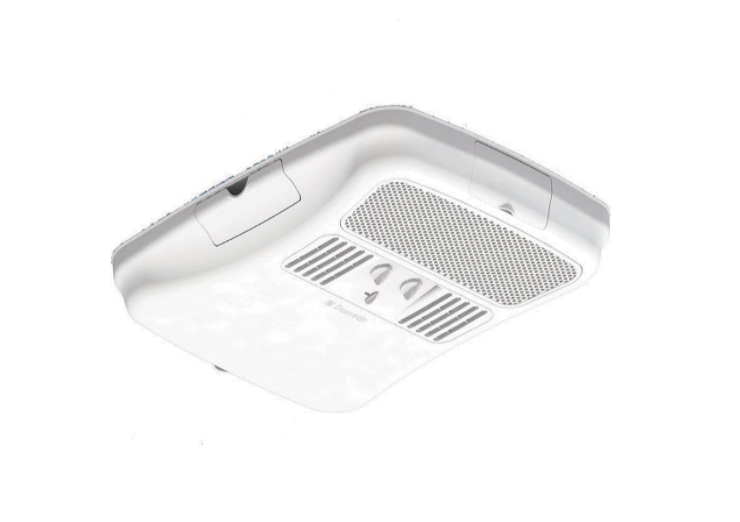
The Penguin II measures just 11.25 inches in height, making it one of the lowest-profile rooftop air conditioners available. This reduced height delivers tangible benefits beyond aesthetics—lower profile units experience less wind resistance during travel, translating to measurable improvements in fuel economy. For RVers covering thousands of miles annually, these aerodynamic gains compound into significant savings at the fuel pump.
At under 100 pounds installed weight, the Penguin II qualifies as one of the lighter high-capacity rooftop units. This weight advantage matters particularly for travel trailers and smaller motorhomes where every pound affects towing capacity, payload ratings, and overall handling characteristics. The lighter weight also simplifies installation, allowing two reasonably fit individuals to manage positioning and mounting without specialized lifting equipment.
Electrical Requirements and Efficiency
The high-efficiency 11K BTU Penguin II model operates on just 11.4 amps total (8.8 amps compressor, 2.6 amps fan), allowing it to run from a standard 15-amp circuit. This efficiency breakthrough enables RV owners to operate their air conditioning from smaller generators or limited electrical service without constantly tripping breakers or compromising other systems.
Standard 13,500 BTU models typically draw 13-15 amps during operation, well within the capacity of common 20-amp RV circuits. The units operate on standard 115-volt AC power, compatible with shore power connections, generators, and properly sized inverter systems. Startup surge current briefly spikes to approximately 30-35 amps, though soft-start modifications can reduce this initial draw significantly for those operating from generators or battery-inverter combinations.
Compatibility: Ducted and Non-Ducted Applications
The Penguin II's versatile design accommodates both ducted and non-ducted installation configurations, providing flexibility for various RV layouts and ceiling systems. This dual-capability proves invaluable when replacing failed units in existing RVs where changing from one configuration to another might otherwise require extensive modifications.
Non-ducted installations utilize an air distribution box mounted directly beneath the rooftop unit, delivering cooled air into a single location—typically positioned centrally for optimal circulation. This simpler configuration costs less to install, requires no complex ductwork, and concentrates powerful airflow in high-traffic living areas. Non-ducted setups require an air distribution box (ADB) purchased separately, which provides manual or thermostat-controlled operation.
Ducted systems route conditioned air through flexible or rigid ducts to multiple vents positioned throughout the RV interior. This distribution method provides more even temperature control across separate spaces like bedrooms and bathrooms, reduces noise in living areas by dissipating airflow across multiple outlets, and creates a more residential feel with discrete ceiling vents rather than prominent distribution boxes. Ducted installations require a return air grille and compatible control kit, both purchased separately.
3. Key Features That Set the Penguin II Apart
Low Profile Design: More Than Meets the Eye
The Dometic Penguin II's low-profile configuration represents far more than cosmetic styling—it embodies functional engineering that delivers measurable real-world benefits. The 11.25-inch height combines with a sleek contemporary shroud to improve aerodynamics and reduce wind resistance, directly impacting fuel efficiency when driving or towing your RV.
Wind resistance increases exponentially with frontal area and height. Each additional inch of rooftop profile creates turbulence that forces your engine to work harder, consuming extra fuel to maintain highway speeds. Independent testing suggests that switching from a traditional 13-14 inch AC unit to the Penguin II's low-profile design can improve highway fuel economy by 2-4%—a meaningful difference over thousands of annual travel miles.
Beyond fuel savings, the reduced profile minimizes clearance concerns under tree branches, parking structures, and service station canopies. Many RV parks feature mature trees that overhang sites, and lower-profile equipment reduces the risk of damage from unexpected contact. The streamlined appearance also contributes to modern RV aesthetics, complementing contemporary exterior designs rather than appearing as an ungainly afterthought.
High Capacity Cooling: Power When You Need It
The Penguin II's high-performance motor and fan system deliver powerful cooling performance even in challenging conditions. This cooling capacity isn't merely about raw BTU ratings—it reflects the system's ability to rapidly reduce interior temperatures, maintain comfort during extreme heat, and recover quickly after opening doors or windows.
The 13,500 to 15,000 BTU capacity range positions the Penguin II ideally for typical RV applications. Travel trailers from 20 to 35 feet, Class C motorhomes, and smaller Class A coaches all fall comfortably within this cooling range. While 15,000 BTU units provide the most aggressive cooling for larger RVs or extreme climates, 13,500 BTU models prove more than adequate for typical applications.
Real-world cooling performance depends on multiple factors beyond BTU ratings. Insulation quality, window coverage, awning usage, and interior heat sources all affect how much cooling capacity you actually need. Well-insulated modern RVs with thermal windows and adequate awnings may achieve comfortable temperatures with less capacity than older units with single-pane windows and minimal insulation.
Heat Pump Functionality: Year-Round Comfort
While many RV owners view their air conditioners as summer-only equipment, heat pump RV air conditioner models extend climate control capabilities across multiple seasons. The Dometic Penguin II with heat pump functionality essentially provides two systems in one unit—powerful cooling for hot weather and efficient heating for moderate cold conditions.
Heat pumps operate by reversing the refrigeration cycle, extracting heat from outdoor air and transferring it inside. This process works effectively in moderate temperatures but struggles below approximately 45 degrees Fahrenheit, where efficiency drops dramatically and the unit may cease operation entirely. For mild winter camping or shoulder-season adventures in temperate regions, heat pump operation provides comfortable warmth while consuming less energy than electric resistance heating.
Heat pump operation on shore power can significantly reduce propane consumption, saving money on fuel costs during extended stays. This advantage proves particularly valuable for full-timers or those spending weeks at a single location where propane refilling becomes inconvenient. However, for extreme winter conditions, RV propane furnaces remain the preferred heating solution, as they maintain effectiveness regardless of outdoor temperatures.
The heat pump RV air conditioner configuration typically adds $200-400 to the unit's purchase price but eliminates the need for separate heat strips that provide less efficient electric heating. For three-season campers or those avoiding harsh winter conditions, the heat pump represents excellent value through extended usability and reduced propane dependence.
Eco-Friendly R410A Refrigerant
The Penguin II utilizes R410A refrigerant, a more environmentally friendly option that releases heat more efficiently than older refrigerant technologies. This modern refrigerant doesn't deplete the ozone layer like legacy options and provides superior thermodynamic properties that enhance cooling performance while reducing environmental impact.
R410A operates at higher pressures than older R-22 refrigerant, requiring specific system designs and components. This higher-pressure operation actually improves heat transfer efficiency, allowing the Penguin II to achieve its rated cooling capacity with less energy consumption. The improved efficiency translates to lower operating costs, reduced generator runtime when boondocking, and extended battery life when running from inverter power.
Environmental consciousness increasingly influences consumer purchasing decisions, and choosing equipment with eco-friendly refrigerants aligns with sustainable recreation principles. As regulations continue phasing out older refrigerants, selecting R410A-equipped units ensures long-term parts availability and service support without facing obsolescence concerns that plague aging systems.
Quiet Operation: Peaceful Comfort
Air conditioner noise levels dramatically affect RV livability, influencing sleep quality, conversation comfort, and overall enjoyment. Premium RV air conditioners like the RecPro models produce sound levels around 59 decibels at maximum operation, setting benchmarks for quiet performance. While specific decibel ratings vary across Penguin II models, the unit's design focuses on minimizing vibration and operational noise through careful engineering.
The Dometic Brisk II achieves quiet operation by mounting the motor, compressor, and evaporator together on isolated brackets that reduce vibrations transmitted to the RV structure. The Penguin II employs similar engineering principles, ensuring that mechanical noise doesn't resonate through roof structures and ceiling materials that can amplify sound.
For perspective, normal conversation occurs at approximately 60 decibels, while whispered speech measures around 30 decibels. A well-designed RV air conditioner operating below 60 decibels allows normal conversation, television viewing at reasonable volumes, and comfortable sleeping without constant mechanical drone. Compare this to older or budget units that generate 70+ decibels—roughly equivalent to a vacuum cleaner running continuously—and the value of quiet operation becomes immediately apparent.
Robust Construction for Long Service Life
Despite its compact and lightweight design, the Penguin II features a robust rib-reinforced base pan that ensures durability in tough environments for extended service life. RV rooftop equipment endures harsh conditions that residential HVAC systems never experience—constant vibration from road travel, dramatic temperature swings, exposure to rain, hail, and intense UV radiation, and physical stress from wind forces at highway speeds.
The custom wrap-around shroud and carbon steel base pan add strength, protection, and durability to contribute to this lasting design. These structural elements protect internal components from weather exposure while maintaining rigidity that prevents warping or distortion under thermal cycling. The thoughtful design balances weight reduction with structural integrity, avoiding the common pitfall of units that achieve low weight through thin materials that quickly deteriorate.
Dometic insulates Penguin II units with EPP foam housing, which provides protection to interior components while contributing to lighter overall weight compared to sheet metal insulation. This foam insulation serves multiple purposes: thermal isolation that improves efficiency, acoustic dampening that reduces operational noise, and physical protection for delicate refrigeration components during transport.
4. Installation Guide: Professional Results
Pre-Installation Planning and Assessment
Successful installation begins with thorough preparation and realistic assessment of your capabilities. While many RV owners successfully install their own air conditioners, the process requires comfort with electrical systems, ability to work safely on rooftops, and attention to weatherproofing details that prevent expensive water damage.
Measuring Your Roof Opening
Standard RV air conditioners fit 14 x 14-inch roof openings, the industry-standard dimension that most manufacturers adopted decades ago. Measure your existing opening carefully before ordering to confirm compatibility—while most RVs use this standard size, some custom builds or specialty units may have unique dimensions that require adaptation.
Measure roof thickness at the opening to ensure proper fitment of mounting hardware. Most RV roofs measure 2-4 inches thick when accounting for roof membrane, substrate, and interior ceiling panel. If your roof exceeds standard thickness, you may need extended mounting bolts or spacers to achieve proper compression of gaskets and weatherproofing materials.
Electrical System Verification
Confirm that your electrical system provides adequate capacity for the new air conditioner. Most modern RVs include dedicated 15-20 amp circuits for roof air conditioners, properly sized for equipment loads. However, older units or those with aftermarket electrical modifications may have undersized wiring or inadequate breaker protection that requires upgrading before installation.
Verify that your shore power connection, generator, or inverter system can support the air conditioner's electrical demands plus other simultaneous loads. A 13,500 BTU air conditioner drawing 14 amps leaves limited capacity on a 20-amp circuit for other devices—running a microwave or hair dryer while the AC operates may trip breakers without proper load management.
Required Tools and Materials
Assembling necessary tools and materials before beginning prevents frustrating interruptions:
Essential Tools:
- Socket wrench set (particularly 7/16" and 1/2" sockets)
- Phillips and flathead screwdrivers
- Power drill with appropriate bits
- Putty knife or scraper for old sealant removal
- Wire strippers and electrical crimpers
- Voltage tester for safety verification
- Stable ladder with roof stabilizers
- Safety harness or fall protection (recommended)
Materials and Supplies:
- High-quality RV lap sealant (Dicor, ProFlex, or equivalent)
- Gasket material (typically included with new unit)
- Electrical tape and wire nuts
- Mineral spirits or adhesive remover for cleanup
- Clean rags and paper towels
- Protective gloves and safety glasses
Step-by-Step Installation Process
Safety First: Power Disconnection
Before beginning any work, completely disconnect all power sources. Unplug shore power, turn off generators, and disconnect battery connections at the main disconnect or individual battery terminals. Use a voltage tester to verify no current flows through the air conditioner circuit—even experienced technicians occasionally misidentify circuits, and testing prevents dangerous surprises.
Removing the Old Unit
Begin inside your RV by removing the ceiling assembly. Most units secure with screws around the perimeter of the grille or distribution box. Carefully lower the interior components while supporting their weight—even lightweight assemblies can cause injury if dropped unexpectedly. Disconnect electrical connections, photographing or labeling wires before removal to ensure correct reconnection.
From the rooftop, remove mounting bolts securing the old air conditioner to the roof structure. These bolts often corrode from weather exposure, requiring penetrating oil and patient persuasion rather than brute force that risks stripped heads or broken bolts. Once hardware is removed, gently rock the old unit to break the sealant bond, then lift straight up to remove from the opening.
Preparing the Roof Surface
Thoroughly clean the roof surface around the opening, removing all old sealant, gasket material, and debris. Use a putty knife or scraper for thick sealant buildup, followed by mineral spirits or adhesive remover for residue. The goal is creating a clean surface for new sealant that bonds properly without contamination from old materials.
Inspect the roof structure for damage, rot, or deterioration. Address any structural issues before installing the new unit—water-damaged roof substrates cannot properly support mounting loads or maintain weatherproof seals. Small repairs are straightforward at this stage but become expensive problems if ignored.
Installing the New Penguin II
Apply fresh gasket material or sealant to the mounting flange of your new Penguin II according to manufacturer instructions. Some units include pre-installed gaskets that require no additional sealant, while others need liberal bead of lap sealant around the mounting perimeter. Follow Dometic's specific guidelines for your model to ensure proper weatherproofing.
Carefully position the unit over the roof opening, aligning mounting holes with existing bolt locations in the roof structure. Having a helper inside the RV simplifies alignment—they can guide your positioning while you maintain control of the heavy unit on the roof. Lower the air conditioner into place, ensuring the gasket seats evenly around the entire perimeter without gaps or displaced sections.
Insert mounting bolts through the unit's base pan and roof structure, hand-tightening initially to verify proper thread engagement. Once all bolts are started, progressively tighten in a cross-pattern rather than fully securing one location before moving to the next. This systematic approach ensures even gasket compression and prevents warping of the base pan that could compromise the weather seal.
Interior Assembly and Electrical Connection
Return inside the RV to complete installation. Connect electrical wiring according to manufacturer specifications and your documentation of original connections. Most installations use simple plug-in connectors that prevent incorrect wiring, but always verify proper connections before restoring power. Secure wire connections inside junction boxes, ensuring adequate strain relief that prevents tension on terminal connections.
Install the ceiling assembly according to your configuration—either an air distribution box for non-ducted systems or return air grille for ducted installations. Ensure proper sealing between the ceiling assembly and interior ceiling panel to prevent air leakage that reduces efficiency. Most ceiling assemblies include foam gaskets or require separate weatherstripping to achieve airtight mounting.
Testing and Final Adjustments
Restore electrical power and test all functions before finalizing installation. Verify cooling operation, fan speeds, and thermostat control (if applicable). Listen for unusual sounds that might indicate loose components or improper installation. Check for proper drainage of condensate—most units drain through small holes in the base pan that should not be blocked during installation.
Inspect the rooftop seal from all angles, looking for gaps or areas where sealant didn't fully compress. Apply additional sealant if necessary to ensure complete weatherproofing. Many experienced installers apply a finishing bead of lap sealant around the entire unit perimeter for additional protection, though this isn't strictly necessary if the gasket sealed properly.
Safety Precautions and Professional Assistance
Working on RV rooftops presents legitimate safety hazards that demand respect and appropriate precautions. Use stable ladders with roof stabilizers that prevent scratching or denting RV sides. Consider fall protection systems, particularly for taller motorhomes or when working alone. Never work on wet or icy roofs where slipping risks become unacceptable.
If you lack confidence in electrical work, feel uncomfortable with heights, or simply prefer professional installation, hire qualified RV technicians for the job. Installation costs typically range from $200-400 for straightforward replacements, money well spent for safety assurance and warranty protection. Many mobile RV service providers will travel to your location, eliminating the need to transport your rig to a service center.
5. Maintenance and Troubleshooting
Routine Maintenance for Optimal Performance
Preventive maintenance represents your best defense against premature failure and declining performance. Establishing regular maintenance routines takes minimal time while dramatically extending equipment lifespan and maintaining peak efficiency.
Filter Cleaning and Replacement
Return air filters capture dust and debris, protecting internal components while maintaining air quality. Inspect filters monthly during active use, cleaning or replacing as needed. Most Penguin II installations use washable foam or mesh filters that rinse clean with mild soap and water. Allow filters to dry completely before reinstallation—installing damp filters promotes mold growth and reduces effectiveness.
Heavily clogged filters restrict airflow, forcing the system to work harder while delivering less cooling. Severe restriction can cause evaporator coils to freeze, completely blocking airflow and potentially damaging the compressor through liquid refrigerant return. The few minutes required for monthly filter maintenance prevents these problems entirely.
Coil Cleaning
Condenser coils on the rooftop unit accumulate dust, pollen, cottonwood seeds, and debris that insulate fins and reduce heat rejection efficiency. Inspect exterior coils at least twice annually, cleaning as needed using low-pressure water spray or soft brushes. Avoid high-pressure washing that bends delicate fins or forces water into electrical components.
Interior evaporator coils also accumulate dust over time, though the filter system reduces contamination if maintained properly. Access evaporator coils by removing interior ceiling panels—check your owner's manual for specific instructions. Clean carefully using coil cleaning solution and soft brushes, rinsing thoroughly to remove chemical residue.
Gasket and Seal Inspection
Inspect roof sealant and gaskets seasonally, looking for cracking, separation, or areas where weatherproofing has deteriorated. Address small seal failures immediately before water intrusion causes expensive damage. Reapply lap sealant as needed, cleaning surfaces thoroughly before application to ensure proper adhesion.
Electrical Connection Verification
Annually inspect electrical connections for corrosion, looseness, or signs of overheating like discolored wire insulation or burnt terminals. Tighten loose connections and clean corroded terminals with electrical contact cleaner and fine sandpaper. Ensure all junction boxes remain sealed against moisture that causes corrosion.
Common Issues and Solutions
Insufficient Cooling Performance
When your Penguin II fails to cool adequately, begin with simplest explanations before assuming major component failure:
-
Verify thermostat settings - Confirm temperature and fan settings are appropriate. Check thermostat batteries if applicable.
-
Inspect and clean filters - Restricted airflow from dirty filters is the most common cause of reduced cooling.
-
Check for airflow obstructions - Ensure nothing blocks supply or return vents inside the RV.
-
Clean condenser coils - Debris-covered exterior coils dramatically reduce cooling capacity.
-
Verify adequate power supply - Low voltage from generators or long shore power cords reduces compressor efficiency.
If basic troubleshooting reveals no obvious issues, refrigerant loss becomes likely. This requires professional service—attempting DIY refrigerant work without proper equipment, training, and EPA certification violates environmental regulations and risks expensive equipment damage.
Excessive Noise or Vibration
Unusual sounds demand immediate attention before minor issues escalate into major failures:
-
Rattling or buzzing - Usually indicates loose mounting hardware or shroud panels. Systematically check and tighten all fasteners.
-
Grinding or squealing - Suggests bearing wear in fan motors. This requires professional evaluation and likely motor replacement.
-
Clicking or humming without operation - Points to electrical problems like failed capacitors or relay issues. Professional diagnosis prevents further damage.
Water Leaks
Water appearing around your air conditioner has two potential sources requiring different approaches:
External leaks from roof seal failure - These manifest during rain or road travel when water spray contacts the roof. Inspect roof sealant carefully, looking for cracks or separation. Reseal as needed using appropriate RV lap sealant.
Internal leaks from condensate drainage - These occur during cooling operation when condensate production overwhelms drainage capacity or drain paths become blocked. Clean drain holes in the base pan, ensure proper unit levelness for gravity drainage, and verify drain lines (if equipped) remain connected and unobstructed.
System Won't Start
When your Penguin II fails to operate at all, systematic diagnosis identifies the problem:
-
Verify power at the unit - Use a voltage tester to confirm 115V AC power reaches the air conditioner. No power indicates tripped breakers, blown fuses, or wiring failures.
-
Check thermostat operation - Replace batteries if applicable. Verify thermostat calls for cooling when set below current temperature.
-
Listen for compressor attempt - If the fan runs but cooling doesn't occur, the compressor may be attempting to start but failing due to capacitor failure or mechanical problems.
-
Identify error codes - Some thermostat-controlled systems display error codes that indicate specific failures. Consult your manual for code interpretation.
Complex electrical or refrigeration failures require professional service. Attempting repairs without proper knowledge risks personal injury, equipment damage, and warranty voidance.
Extending Service Life Through Proper Care
Beyond routine maintenance, several practices dramatically extend your Penguin II's operational lifespan:
Operate regularly during off-season - Run the air conditioner monthly for 30 minutes even during winter to circulate refrigerant and lubricate compressor components. This prevents oil separation and internal corrosion that occurs during extended dormancy.
Use weatherproof covers during storage - Quality RV AC covers protect against snow accumulation, ice formation, and UV degradation during extended storage periods. Remove covers before operation to prevent overheating.
Manage electrical loads carefully - Avoid running the air conditioner on undersized generators or while simultaneously operating other high-draw appliances. Chronic low-voltage operation causes premature compressor failure.
Address problems promptly - Strange sounds, declining performance, or unusual operation patterns warrant immediate attention. Small issues caught early prevent expensive repairs or premature replacement.
6. Frequently Asked Questions
Q1: What differentiates the Penguin II from other RV air conditioners?
The Dometic Penguin II distinguishes itself through several key advantages. Its ultra-low 11.25-inch profile reduces wind resistance and improves fuel efficiency while the contemporary design enhances RV aesthetics. The lightweight yet robust construction balances weight savings with durability. Eco-friendly R410A refrigerant provides efficient cooling with reduced environmental impact. Versatile installation options accommodate both ducted and non-ducted configurations. Combined, these features create a well-engineered solution that addresses real-world RV needs rather than simply maximizing cooling capacity at the expense of other considerations.
Q2: Can the Penguin II be used in both ducted and non-ducted systems?
Yes, the Penguin II accommodates both ducted and non-ducted applications, providing installation flexibility for various RV configurations. This versatility proves valuable when replacing existing units where changing from one configuration to another might otherwise require extensive modifications. Non-ducted installations require an air distribution box (ADB) purchased separately, while ducted systems need a return air grille and control kit. Confirm which accessories your specific installation requires before ordering to avoid delays or incomplete installations.
Q3: How energy-efficient is the Penguin II compared to alternatives?
The high-efficiency 11K BTU Penguin II model operates on just 11.4 amps total, allowing operation from a 15-amp circuit—a significant efficiency advantage over standard units requiring 20-amp service. Standard 13,500 BTU models typically draw 13-15 amps, positioning them competitively against similar-capacity alternatives. The use of R410A refrigerant contributes to efficiency through superior heat transfer properties compared to older refrigerant technologies. While specific EER (Energy Efficiency Ratio) ratings vary by model, the Penguin II's overall design emphasizes efficient operation that reduces generator runtime, extends battery life during inverter operation, and minimizes energy costs when connected to shore power.
Q4: Is professional installation required for the Penguin II?
Professional installation isn't absolutely required but is strongly recommended for those without electrical experience, discomfort with rooftop work, or concern about weatherproofing details. The installation process involves working at heights, handling 100-pound equipment, making electrical connections, and ensuring weatherproof sealing that prevents expensive water damage. Competent DIY enthusiasts with appropriate tools and safety equipment successfully install their own units regularly, potentially saving $200-400 in labor costs.
However, improper installation creates serious problems: inadequate weatherproofing causes water intrusion that damages interior finishes and electrical systems, incorrect electrical connections present fire hazards, and poor mounting techniques allow units to work loose during travel. Professional installation provides peace of mind through proper technique, warranty protection, and accountability if problems arise. For most RV owners, professional installation represents wise investment that ensures safe, correct results.
Q5: What warranty coverage does Dometic provide for the Penguin II?
Dometic provides a 2-Year Protection Plus Warranty on Penguin II air conditioners, covering defects in materials and workmanship under normal use. This warranty duration exceeds many competitors' standard one-year coverage, reflecting Dometic's confidence in product reliability. Warranty coverage typically includes parts and labor when service is performed by authorized Dometic service centers.
Important warranty considerations: Most warranties require professional installation to remain valid. Keep all purchase receipts and installation documentation. Register your product promptly after installation. Understand exclusions—warranties typically don't cover damage from improper installation, lack of maintenance, electrical surges, or physical damage from accidents or severe weather. Extended warranty options may be available at purchase, providing additional protection beyond standard coverage.
Q6: How does the heat pump model compare to cooling-only versions?
Heat pump models provide both cooling and heating capabilities in a single unit, extending usability across multiple seasons. Heat pumps work effectively in moderate temperatures but struggle below approximately 45 degrees Fahrenheit, where efficiency drops dramatically. For spring and fall camping or winter travel in mild climates, heat pump operation provides comfortable warmth while reducing propane consumption on shore power compared to running propane furnaces.
Heat pump models typically cost $200-400 more than cooling-only equivalents but eliminate the need for separate heat strips that provide less efficient electric heating. For three-season campers who avoid harsh winter conditions, the heat pump delivers excellent value through extended usability. However, for extreme cold weather camping, propane furnaces remain essential as they maintain effectiveness regardless of outdoor temperatures.
7. Real-World User Experiences
Case Study: Full-Time RVers in the Southwest
Mark and Jennifer transitioned to full-time RV living in their 32-foot fifth wheel, spending summers in Colorado and winters throughout Arizona and New Mexico. Their factory-installed air conditioner struggled with Arizona's extreme heat, barely maintaining 85°F interior temperatures when outdoor conditions reached 110°F-plus.
After upgrading to a Dometic Penguin II with 15,000 BTU capacity, their climate control transformed completely. "The difference is night and day," Jennifer reports. "We can keep the RV at 72 degrees even in mid-afternoon Tucson heat. The low-profile design also improved our fuel economy—we're seeing about 0.4 MPG better than before, which adds up to real money over 15,000 annual miles."
The couple particularly appreciates the quiet operation during sleeping hours. "Our old unit sounded like a freight train. The Penguin II runs so quietly that we barely notice it, even in the bedroom directly below the roof unit." The heat pump functionality provides comfortable warmth during chilly desert evenings without running their propane furnace, extending their boondocking capability significantly.
Case Study: Weekend Warriors Upgrading for Comfort
The Martinez family uses their 24-foot travel trailer for weekend camping throughout the Mid-Atlantic region. Their original non-ducted air conditioner worked adequately but generated excessive noise and struggled to cool evenly across their floor plan.
They selected a 13,500 BTU Penguin II primarily for its reputation for quiet operation and efficient cooling. Installation took approximately four hours with professional assistance, costing $350 including labor. "The investment paid off immediately," reports Carlos Martinez. "Our kids actually sleep through the night now because the AC doesn't wake them. And we can have normal conversations without yelling over the noise."
The family also notice