
Dometic Air Distribution Box Guide: Installation & Troubleshooting
Share
I. Introduction
The Dometic Air Distribution Box serves as the critical nerve center of recreational vehicle climate control systems, quietly orchestrating comfortable living conditions as you travel across continents or park under the desert sun. This essential component acts as the intermediary between your rooftop air conditioning unit and the living spaces within your RV, efficiently channeling cooled or heated air through strategically placed ducts to maintain optimal temperature throughout your mobile home.
As the global RV industry experiences unprecedented growth—with North American sales surpassing 600,000 units annually and European markets expanding by double digits—the demand for reliable, efficient climate control components has never been higher. The Dometic Air Distribution Box for RV air conditioners stands at the forefront of this evolution, representing decades of engineering refinement specifically tailored to the unique challenges of mobile living: constant vibration, limited power availability, compact installation spaces, and the need for whisper-quiet operation during rest hours.
This comprehensive guide explores everything RV owners, technicians, and enthusiasts need to know about Dometic Air Distribution Boxes. From understanding their fundamental operation and navigating global market trends, to mastering installation procedures and troubleshooting common issues, we provide actionable insights that empower you to maximize comfort, extend equipment lifespan, and make informed purchasing decisions. Whether you're a weekend warrior maintaining your travel trailer or a full-time nomad relying on your fifth wheel's climate system daily, this resource delivers the knowledge you need to keep your mobile sanctuary comfortable in any conditions.
II. Understanding the Dometic Air Distribution Box
Definition and Operating Principles
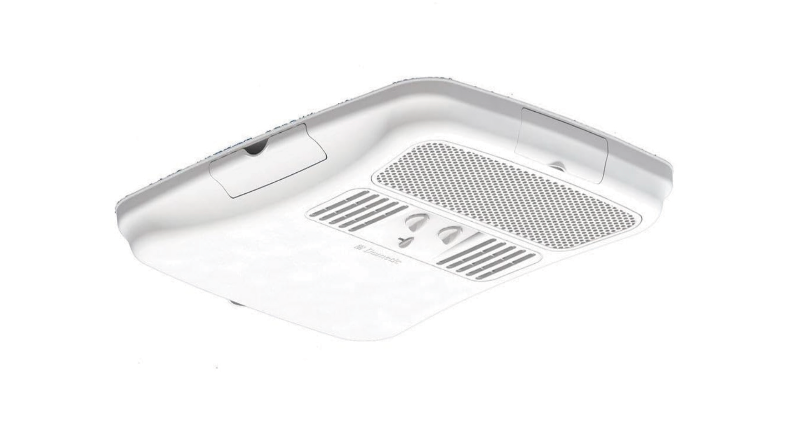
At its core, the Dometic Air Distribution Box functions as an air management hub that receives conditioned air from your rooftop HVAC unit and distributes it methodically throughout your RV's interior spaces. Unlike residential HVAC systems that benefit from spacious mechanical rooms and abundant installation flexibility, RV climate systems must operate within severe space constraints while enduring constant motion and vibration.
The operating principle is elegantly straightforward yet sophisticated in execution. When your rooftop air conditioner cools air, that conditioned air must travel from the roof down into living areas—sometimes a distance of eight feet or more. The Air Distribution Box houses a powerful yet efficient fan that creates the pressure differential necessary to push air through the duct network. Simultaneously, it draws return air from the living space through a filtered intake, completing the circulation cycle essential for effective climate control.
Modern Dometic ADB units incorporate several key components working in concert: a DC motor-driven fan optimized for RV electrical systems, a filter housing that protects mechanical components while improving air quality, a sealed housing that prevents air leakage and moisture intrusion, control electronics that interface with thermostats and zone management systems, and precisely engineered inlet and outlet ports that minimize turbulence and maximize airflow efficiency.
The physics underlying effective air distribution involves careful attention to static pressure, CFM ratings, and duct sizing. Dometic engineers design their Air Distribution Boxes to generate sufficient pressure to overcome resistance throughout the duct system while maintaining reasonable power consumption—typically drawing between 3 and 8 amps at 12 volts DC depending on fan speed and system configuration.
Common Types and Variants
Manual control systems represent the traditional and most straightforward configuration. These units operate at a single fixed speed whenever the thermostat calls for cooling or heating. They feature simple on/off operation controlled by a basic wall-mounted thermostat, typically requiring minimal wiring—just power, ground, and a signal wire from the thermostat. Manual systems offer exceptional reliability due to their simplicity, with fewer components that might fail. They're also the most affordable option, making them popular in entry-level travel trailers and older RVs. However, they lack the refinement of variable-speed operation, meaning they run at full power regardless of actual cooling demand, which can be noisy and less energy-efficient.
Remote-controlled and variable-speed systems provide significantly enhanced user experience through multi-speed fan operation that adjusts to cooling load. These systems typically offer three to five fan speeds, allowing quieter operation during nighttime or when partial cooling suffices. Modern digital thermostats provide precise temperature control with programmable settings, and some models include wireless remote controls for convenient adjustment from anywhere in the RV. The variable-speed capability delivers tangible benefits: reduced power consumption when full cooling isn't needed, quieter operation that dramatically improves livability, better humidity control through longer, slower fan cycles, and extended motor life due to less frequent operation at maximum load.
Combination heating and cooling variants integrate with both rooftop air conditioners and furnace systems, providing year-round climate control through a single distribution network. These units feature dual inlet ports—one connecting to the AC unit and another to the furnace—with internal dampers or valves that direct airflow from the appropriate source based on thermostat mode. This integrated approach offers several advantages: simplified ductwork using a single distribution system for both heating and cooling, consistent airflow patterns regardless of season, and space savings compared to separate heating and cooling distribution systems. These combination units are particularly popular in four-season RVs and among full-time RVers who require reliable climate control throughout the year.
Zoned systems represent the premium tier, incorporating motorized dampers that allow independent temperature control in different areas of the RV. Large motorhomes and fifth wheels often feature separate climate zones for bedroom areas, main living spaces, and sometimes bathroom or bunk rooms. Each zone has its own thermostat, and the Air Distribution Box coordinates damper positions and fan speed to satisfy all zones efficiently. While more complex and expensive, zoned systems prevent the common issue of overcooling the bedroom while trying to adequately cool a sun-drenched living room, resulting in improved comfort and energy efficiency.
Relationship with RV Air Conditioning Systems
The Air Distribution Box doesn't operate in isolation but rather forms one critical element within a comprehensive HVAC ecosystem. Understanding this relationship helps diagnose problems and appreciate the importance of proper ADB selection and maintenance.
Integration with rooftop units: The rooftop air conditioner generates cooled air through a refrigeration cycle, but that cooled air must travel efficiently into the living space. The ADB connects directly to the rooftop unit's discharge plenum—typically through a flexible transition duct or direct connection. The ADB fan assists the rooftop unit's blower in overcoming resistance throughout the distribution system. Mismatched components can create problems: an undersized ADB restricts airflow, causing the rooftop unit to freeze up or cycle inefficiently, while an oversized ADB may create excessive noise and consume unnecessary power without improving cooling performance.
Ductwork considerations: The duct network connecting the ADB to room registers must be properly designed and installed to work effectively. Dometic ADB units are engineered for standard 4-inch flexible or rigid ducting common in RV construction. Proper duct sizing, support, and sealing directly impact system performance. Crushed, kinked, or improperly sealed ducting forces the ADB to work harder while delivering less airflow, reducing cooling effectiveness and increasing power consumption.
Electrical system interaction: Unlike residential HVAC systems that run on 120V or 240V AC power, RV Air Distribution Boxes typically operate on 12V DC power drawn from the RV's house battery system. This design allows the distribution system to operate even when not connected to shore power, using battery or generator power. However, this also means the ADB's power consumption directly impacts battery capacity—an important consideration for boondockers and off-grid enthusiasts. A well-matched system balances cooling effectiveness with reasonable power consumption.
Thermostat and control systems: Modern RV thermostats communicate with both the rooftop unit and the ADB, coordinating their operation for optimal comfort and efficiency. When the thermostat calls for cooling, it signals the rooftop unit to begin the refrigeration cycle while simultaneously activating the ADB fan. More sophisticated systems modulate fan speed based on temperature differential or zone demands, providing superior comfort while minimizing power consumption. Understanding this relationship helps when troubleshooting issues—a malfunctioning thermostat might prevent the ADB from operating even when the rooftop unit functions correctly, or vice versa.
III. Global Market Overview
Regional Demand Comparison
North America maintains its position as the dominant market for Dometic Air Distribution Box products, representing approximately 65% of global demand. The United States alone accounts for the majority of this market, driven by a well-established RV culture with over 11 million households owning recreational vehicles. The replacement parts market is particularly robust, as the average RV age exceeds 15 years, creating consistent demand for maintenance and upgrade components. Canadian markets show similar patterns with additional emphasis on four-season capability due to harsher winter conditions. Market dynamics in North America favor premium products with advanced features—consumers demonstrate willingness to invest in upgraded systems that improve comfort and reliability. The extensive dealer network and strong aftermarket support infrastructure make Dometic the preferred choice for both OEM installations and replacement applications.
Europe represents the second-largest market with distinct characteristics shaped by different RV design philosophies and regulatory environments. European motorhomes and caravans typically feature more compact designs than their American counterparts, requiring Air Distribution Boxes optimized for tighter installation spaces and lower power consumption. The European market shows stronger preference for integrated heating and cooling solutions, as year-round use is more common than in North America. Germany, France, the United Kingdom, and Scandinavia lead demand, with each market demonstrating unique preferences—German consumers prioritize engineering quality and efficiency, French buyers focus on compact designs suitable for smaller campervans, and Scandinavian markets demand exceptional cold-weather performance. Energy efficiency regulations in the EU drive innovation, with stricter requirements for power consumption and refrigerant management influencing product development.
Asia-Pacific emerges as the fastest-growing market segment, though still representing a smaller absolute volume compared to Western markets. Australia leads the region with a mature RV culture similar to North America, showing strong demand for Dometic products and robust growth in both new RV sales and aftermarket upgrades. Japan's growing interest in camping and outdoor recreation drives demand for compact, highly refined systems suitable for smaller vehicles. China represents the wild card—a massive potential market where RV adoption is accelerating rapidly among affluent consumers seeking domestic travel alternatives. However, Chinese market penetration remains challenging due to strong domestic competition, different design standards, and price sensitivity. Southeast Asian markets show emerging interest, particularly in Thailand, Malaysia, and Indonesia where converted vans and mobile accommodation serve both tourism and residential needs.
Consumer Trends
Energy efficiency has transitioned from a nice-to-have feature to a fundamental requirement, particularly as boondocking and off-grid camping gain popularity. Consumers increasingly recognize that every amp-hour of battery power matters when camping without hookups. Modern Dometic Air Distribution Boxes address this through brushless DC motors that consume 20-30% less power than traditional motors, intelligent variable-speed controls that reduce power consumption during partial load conditions, optimized aerodynamics that move more air with less energy input, and integration with solar panel systems and battery management systems for maximum efficiency. Marketing materials and product specifications increasingly highlight power consumption figures, with buyers actively comparing amp draws across competing products.
Noise reduction represents another critical trend as RVs evolve from weekend recreation vehicles into mobile homes where people live and work. The ability to run climate control during sleep without disturbing rest has become a significant selling point. Manufacturers respond with vibration-isolated motor mounts, aerodynamically designed fan blades that reduce turbulence noise, improved housing insulation, and variable-speed operation that allows quieter low-speed operation when full cooling isn't required. Consumer reviews consistently mention noise levels, and manufacturers now publish decibel ratings alongside traditional performance specifications.
Ease of maintenance increasingly influences purchasing decisions as DIY culture flourishes within the RV community. Owners prefer systems they can service themselves, reducing dependence on dealers and maintenance costs. Dometic responds by designing Air Distribution Boxes with tool-free filter access, clearly labeled components, published service manuals and installation guides, readily available replacement parts through multiple channels, and modular designs that allow component replacement without specialized tools or complete system replacement. Online communities share maintenance tips and procedures, creating a knowledge ecosystem that empowers owners while simultaneously increasing brand loyalty among those who appreciate serviceable, user-friendly designs.
Future Predictions
Smart integration and connectivity will transform Air Distribution Boxes from purely mechanical components into intelligent nodes within comprehensive RV management systems. Future Dometic ADB units will likely feature WiFi or Bluetooth connectivity for smartphone control, integration with voice assistants like Alexa or Google Home, predictive maintenance alerts based on operating hours and performance metrics, remote diagnostics that allow technicians to troubleshoot issues without physical inspection, and coordination with solar panels, generators, and battery systems for optimized power management. These features align with broader smart home trends and appeal particularly to younger RV owners who expect seamless digital integration.
Lightweight materials and advanced manufacturing will address the perpetual challenge of reducing vehicle weight without sacrificing durability. Innovations include composite materials replacing traditional metal housings, 3D-printed components optimized for strength-to-weight ratios, advanced polymers resistant to UV degradation and temperature extremes, and miniaturization of electronic components reducing overall system mass. Every pound saved in an Air Distribution Box allows additional payload capacity for cargo, water, or supplies—a constant concern among RV owners approaching weight ratings.
Enhanced air quality management responds to growing awareness of indoor air quality, accelerated by pandemic concerns about ventilation and filtration. Future systems may incorporate HEPA or activated carbon filtration, UV-C light systems for airborne pathogen reduction, humidity sensors and automatic dehumidification, air quality monitors displaying particulate levels and recommending filter changes, and integration with ventilation systems for balanced fresh air exchange. These features appeal particularly to full-time RVers and those with respiratory sensitivities.
Modular, upgradeable designs allow systems to evolve with owner needs rather than requiring complete replacement. Dometic may develop ADB platforms accepting plug-in modules for zone control, smart thermostats, enhanced filtration, or backup battery systems, enabling owners to start with basic configurations and add features over time without replacing core components.
IV. Installation Guide
Tools and Preparation Checklist
Successful installation of your Dometic Air Distribution Box begins with proper preparation and having the right tools readily available. Gathering everything beforehand prevents frustrating mid-installation trips to the hardware store.
Essential tools:
- Screwdriver set including Phillips head (#1 and #2) and flathead (various sizes)
- Electric drill with variable speed control
- Drill bit set (1/8" through 1/2" in 1/16" increments)
- Hole saw kit (2" through 6" sizes for duct penetrations)
- Wire strippers and crimping tool for electrical connections
- Multimeter for voltage verification and troubleshooting
- Utility knife with fresh blades for cutting insulation and materials
- Measuring tape (25-foot length minimum)
- Level (torpedo level or longer for ceiling installations)
- Flashlight or headlamp for illuminating workspace
- Safety glasses for overhead work and drilling
- Work gloves to protect hands from sharp edges
- Step stool or ladder appropriate for reaching ceiling areas
- Marker or pencil for marking cut lines and mounting positions
Materials and supplies:
- Dometic Air Distribution Box unit (verify model compatibility)
- Flexible or rigid ducting (4-inch diameter typically, sufficient length for your layout)
- Duct clamps or metal tape rated for HVAC applications
- Silicone or polyurethane sealant (RV-specific formulation resistant to temperature extremes)
- Wire connectors (appropriate gauge for 12V connections)
- Electrical tape (quality vinyl tape rated for temperature)
- Mounting screws (stainless steel or coated to prevent corrosion)
- Weatherstripping or foam gasket material
- Return air filter (correct size for your ADB model)
- Cable ties for securing wiring and ducting
- Insulation if running ducts through unconditioned spaces
Pre-installation verification:
Before beginning installation, carefully review the following considerations that significantly impact success:
Electrical system capacity: Verify your RV's 12V DC system can support the Air Distribution Box's power requirements without overloading circuits. Check that circuit breakers are appropriately rated—typically 15-20 amps for the HVAC circuit. Measure actual voltage at the installation location to ensure adequate power delivery; voltage drop over long wire runs can reduce motor performance. If installing in an older RV, inspect existing wiring for signs of corrosion or damage that might affect reliability.
Compatibility verification: Confirm absolute compatibility between your new Air Distribution Box and existing rooftop HVAC unit. Check model numbers against Dometic's compatibility charts available on their website or in product documentation. Verify that the ADB's airflow capacity (measured in CFM) matches your rooftop unit's output—mismatched systems create problems ranging from inadequate cooling to premature component failure. If replacing an existing ADB from another manufacturer, verify that mounting patterns and duct locations align, or plan for necessary modifications.
Space and clearance assessment: Measure the installation location precisely, accounting for the ADB's physical dimensions plus required clearances. Dometic specifies minimum clearances (typically 2-3 inches on all sides) for proper airflow and future maintenance access. Consider accessibility—you'll need periodic access for filter changes and potential service. Ensure the chosen location allows for proper duct routing without excessive bends that restrict airflow. Verify adequate structural support; ceiling installations require proper backing or reinforcement to support the unit's weight plus vibration forces during travel.
Environmental considerations: Assess the installation environment for factors that might affect performance or longevity. Avoid locations subject to excessive moisture, which can damage electronic components. Consider temperature extremes—areas near the roof get very hot in summer, potentially affecting component life. Plan for condensation drainage if your system produces significant moisture during cooling operations.
Standard Installation Steps
This comprehensive Dometic Air Distribution Box installation guide provides detailed procedures for successful installation, whether you're replacing an existing unit or performing a new installation.
Step 1: Preparation and safety measures
Begin by disconnecting all power to the HVAC system. Switch off the main breaker for the AC unit and verify power is off using a multimeter. This critical safety step prevents electrical shock and accidental system activation during installation. Remove any furniture, cabinets, or interior panels that might obstruct access to the installation area. Protect flooring and furniture below the work area with drop cloths or plastic sheeting to catch debris. If working in the ceiling, wear safety glasses throughout installation to protect from falling debris and insulation fibers.
Step 2: Remove existing unit (if replacing)
For replacement installations, carefully disconnect the existing Air Distribution Box. Photograph all electrical connections before disconnecting—these photos prove invaluable during reassembly. Label wires with masking tape indicating their function (power, ground, thermostat signal, etc.). Disconnect ducting by removing clamps or cutting tape, being careful not to damage ducts if reusing them. Remove mounting screws and carefully lower the old unit, supporting its weight to prevent dropping and damaging interior surfaces. Inspect the mounting area for any damage requiring repair before installing the new unit.
Step 3: Position and mark mounting location
For new installations, determine the optimal ADB location considering duct routing, accessibility, and structural support. The ideal position typically sits centrally within the RV, minimizing duct runs to all registers. Place the new Air Distribution Box in position temporarily and mark all mounting holes with a pencil. Use a level to ensure the unit sits perfectly horizontal—even slight angles can affect drainage and performance. Mark duct opening locations, carefully measuring to ensure they align with existing or planned ductwork.
Step 4: Create necessary openings
Using appropriate hole saws, carefully cut openings for supply and return air ducts. Work slowly with controlled pressure to avoid splintering finished surfaces—drilling from the finished side and then from the back side once the pilot bit penetrates creates cleaner holes. For ceiling installations, protect the area below and yourself from falling debris. Deburr all cut edges with sandpaper or a file to prevent damage to ducting and create clean surfaces for sealing. If installing mounting brackets separately from the ADB unit, secure them now using appropriate screws anchored into solid framing members.
Step 5: Mount the Air Distribution Box
With assistance if needed (some units weigh 15-20 pounds), lift the ADB into position and align mounting holes. Start all mounting screws by hand before tightening any completely—this allows minor position adjustments if holes don't align perfectly. Tighten screws in a crossing pattern to distribute stress evenly, but avoid overtightening which can crack the plastic housing. Verify the unit remains level after tightening. For ceiling installations, ensure screws penetrate into solid backing or ceiling joists rather than just thin paneling that can't support the weight.
Step 6: Connect ductwork
Attach supply ducts to the ADB's outlet ports, ensuring tight connections. Flexible ducting should slide over ports at least 1-2 inches for secure attachment. Secure with appropriate clamps, tightening firmly but not so tight as to compress and restrict the duct. For rigid ducting, use proper connectors or transition fittings to ensure airtight joints. Seal all connections with metal HVAC tape or aluminum foil tape—standard duct tape fails in the temperature extremes found in RVs. Route ducting to register locations, maintaining smooth bends without kinks or sharp angles that restrict airflow. Support ducting every 3-4 feet with hangers or straps to prevent sagging and maintain proper shape. Connect the return air duct from the intake grille to the ADB's return port, using the same careful sealing techniques.
Step 7: Make electrical connections
Following the wiring diagram included with your Air Distribution Box and referencing photos of the previous installation (if replacing), connect electrical wires. Typical connections include main power (red wire, 12V+), ground (black or white wire), and thermostat control wires (colors vary by system). Strip wire ends cleanly using wire strippers, removing only enough insulation to make connections—excessive bare wire creates shock hazards. Use appropriate connectors (crimp connectors or wire nuts rated for 12V DC systems) to join wires securely. Tug gently on each connection to verify it's secure. Wrap all connections with electrical tape, covering bare wire completely. Route wires neatly using cable ties to prevent interference with moving parts and to maintain a professional appearance.
Step 8: Install thermostat and controls
Mount the thermostat in an appropriate location away from direct sunlight, drafts, and heat sources that would cause false readings. Ideal placement is on an interior wall about 5 feet above the floor in a frequently occupied area. Run control wiring from the thermostat to the ADB following manufacturer specifications. Secure control wiring along existing wire runs or through walls using appropriate techniques. Connect thermostat wires according to the wiring diagram—incorrect connections can damage the thermostat or control board.
Step 9: Seal all penetrations
Apply appropriate sealant around all ductwork penetrations to prevent air leaks and moisture intrusion. Pay particular attention to ceiling penetrations that could allow roof leaks to damage interior spaces. Use RV-grade sealants rated for temperature extremes and UV exposure. Smooth sealant with a finger or tool for neat appearance while ensuring complete coverage. Allow sealant to cure per manufacturer recommendations before operating the system.
Step 10: Install filter and covers
Insert the return air filter in its designated location, ensuring proper orientation (airflow direction arrows typically marked on filter frame). Install any access panels, grilles, or decorative covers included with the system. Verify that filter access remains convenient for future maintenance—you'll need to access it regularly.
Step 11: System testing and verification
Restore power to the HVAC system and perform comprehensive testing. Set the thermostat to call for cooling and verify the rooftop unit activates. Listen for the ADB fan to start and feel for airflow at all registers. Check that air volume appears consistent across all registers—significant variations indicate blocked ducts or leaks. Feel ductwork connections for escaping air indicating poor seals. Listen for unusual noises such as rattling, grinding, or whistling that indicate problems. Using a multimeter, verify correct voltage at the ADB connections. Test thermostat functions including mode changes (heat/cool/fan), temperature adjustments, and fan speed settings if variable-speed. Observe several cooling cycles to ensure the system operates correctly with no unexpected behavior.
Step 12: Final adjustments and documentation
Make any necessary adjustments to register louvers to balance airflow throughout the RV. Some areas may need more airflow than others depending on factors like window exposure and insulation. Document your installation with photos and notes, including wire colors and connections, control settings, and any special considerations. File this documentation with your RV maintenance records for future reference. Dispose of the old unit properly if you replaced an existing ADB, and retain all installation documentation and warranty information for the new unit.
Common Installation Mistakes and Prevention
Inadequate sealing of duct connections ranks as the most common and impactful installation error. Even small gaps allow significant air loss, reducing system efficiency by 20-30% in severe cases. Many installers underestimate how much conditioned air escapes through poorly sealed joints. Prevention requires using proper sealing materials—metal foil tape rated for HVAC applications, not standard duct tape which fails in temperature extremes. Apply tape with pressure to ensure good adhesion, overlapping tape edges. For larger gaps, use mastic sealant before taping. Test connections by feeling for escaping air with the system running, and reseal any leaks discovered.
Reversed polarity or incorrect wiring can damage sensitive electronic components in the ADB or thermostat. The 12V DC systems in RVs require careful attention to positive and negative connections. Prevention starts with careful examination of wiring diagrams and existing installations. Use a multimeter to verify wire polarity before making connections—never assume wire colors follow standards, as RV manufacturers sometimes use non-standard color codes. Double-check all connections before restoring power, and consider having another person review your work—a second set of eyes catches errors.
Improper duct routing with excessive bends or kinks severely restricts airflow, forcing the ADB to work harder while delivering less cooling. Each 90-degree bend reduces airflow capacity by approximately 10%. Prevention involves careful planning before cutting any holes. Use the minimum number of turns necessary, and make bends as gradual as possible. If a tight bend is unavoidable, use rigid elbow fittings rather than crushing flexible ducting around corners. Support ducting properly to maintain its shape—unsupported sections can sag and create restrictions over time.
Insufficient structural support for ceiling-mounted units leads to vibration, noise, and eventual damage to both the ADB and surrounding structures. Many installers fail to locate ceiling joists or backing, instead screwing into thin paneling. Prevention requires careful investigation of ceiling structure before installation. Use a stud finder to locate solid framing members, or access the space above the ceiling to visually confirm structure. If adequate framing doesn't exist at the desired location, install blocking between joists to create proper mounting points. Use screws of appropriate length to engage framing by at least 3/4 inch.
Ignoring clearance requirements prevents proper airflow around the unit and complicates future maintenance. Some installers prioritize aesthetics over function, tucking the ADB into tight spaces or against walls. Prevention requires measuring carefully and respecting manufacturer specifications for minimum clearances—typically 2-3 inches on all sides. Consider future maintenance needs when selecting the installation location, ensuring filter access remains convenient.
Failure to properly test before finalizing installation allows problems to go undetected until after access panels are sealed and interior finishes are restored. Prevention involves disciplined testing procedures before considering installation complete. Run the system through multiple cycles, test all modes and speeds, verify airflow at all registers, check for leaks and unusual noises, and measure voltage at various points. Address any issues discovered before closing up access.
Visual Resources and Interactive Content
While this text-based guide provides comprehensive written instructions, visual learners benefit enormously from supplementary resources. Consider seeking the following types of visual aids to complement these written instructions:
Installation videos showing actual installations in real RVs provide invaluable perspective on challenges you might encounter. Many experienced RVers and technicians share installation videos on YouTube and RV forums. Search for "Dometic Air Distribution Box installation" along with your specific RV type for most relevant results.
Wiring diagrams specific to your ADB model and rooftop unit are essential references during electrical connections. These should be included with your new unit, but are also often available on Dometic's website or through dealer technical support.
Exploded view diagrams showing how components fit together help visualize the system and aid troubleshooting. These technical illustrations typically appear in service manuals and parts catalogs.
Interactive installation guides on Dometic's website or mobile apps may provide step-by-step procedures with integrated photos and diagrams, offering advantages over static printed instructions.
V. Replacement Parts & Maintenance Checklist
Common Replacement Components
Understanding Dometic Air Distribution Box replacement parts empowers you to maintain your system effectively and minimize downtime when components eventually wear out.
Air filters represent the most frequently replaced component, serving as the first line of defense protecting your ADB's internal components while improving air quality. Standard fiberglass filters typically measure 14x14 inches or similar dimensions depending on your ADB model. These disposable filters cost $5-$15 each and should be replaced monthly during heavy use or every 2-3 months during moderate use. Pleated filters offer superior filtration, capturing smaller particles and allergens, but cost more ($15-$25) and may restrict airflow slightly. Washable electrostatic filters provide a reusable option, requiring cleaning monthly with soap and water, then complete drying before reinstallation. While more expensive initially ($30-$50), they eliminate ongoing replacement costs over their 2-3 year lifespan.
Fan blades and motors eventually wear out after years of operation, with typical lifespans of 5-10 years depending on usage intensity and operating conditions. Symptoms indicating motor replacement include unusual grinding or squealing noises, reduced airflow despite clean filters and clear ducts, motor that struggles to start or runs intermittently, or complete failure to operate. Replacement motors typically cost $60-$150 depending on specifications and model. When replacing motors, verify exact voltage (12V DC standard), confirm physical mounting dimensions match, and check fan blade attachment method and rotation direction. Some motors include fan blades while others require separate blade purchase. Professional installation ranges from $150-$300 labor, though competent DIYers can perform replacement in 1-2 hours with basic tools.
Control panels and thermostats interface between users and the system, translating desired settings into system commands. Basic analog thermostats cost $30-$60 and provide simple temperature control with manual mode selection. Digital programmable thermostats range from $80-$150, offering features like multiple daily program periods, precise temperature control, and clearer displays. Smart thermostats with WiFi connectivity cost $150-$300 but provide remote control via smartphone apps, voice assistant integration, and energy monitoring. Replacement typically involves straightforward wiring connections following color-coded diagrams, though compatibility verification is essential—not all thermostats work with all ADB models.
Housing components and access panels may require replacement after damage from impacts during travel, stress cracks from overtightened screws, or UV degradation of plastic materials. Complete housing assemblies typically cost $100-$200, while individual panels or covers range from $15-$50. When replacing housing components, ensure exact model match for proper fit and seal integrity.
Gaskets and seals prevent air leakage and moisture intrusion, but deteriorate over time from temperature cycling and compression. Foam gasket material costs $10-$20 for sufficient material to reseal an entire unit. Rubber seals around inlet and outlet ports typically cost $5-$15 per seal. Replacing degraded gaskets dramatically improves system efficiency by preventing conditioned air from escaping before reaching living spaces.
Control boards manage system operation, interpreting thermostat signals and controlling motor speed and damper operation in more sophisticated systems. Circuit board failures result from power surges, moisture exposure, or component aging. Replacement boards cost $100-$250 depending on complexity and features. Installation requires careful attention to wiring connections and static electricity precautions. Many RV owners prefer professional installation of control boards due to their cost and complexity.
Component Lifespan and Replacement Schedule
Creating a replacement schedule helps budget for maintenance and prevents unexpected failures during trips. This comprehensive table provides typical lifespans and replacement recommendations:
Air Filters:
- Expected lifespan: 1-3 months (disposable), 2-3 years (washable)
- Replacement schedule: Monthly during heavy use, every 2-3 months during moderate use, inspect monthly and clean or replace as needed
- Cost: $5-$25 for disposables, $30-$50 for washable
- DIY difficulty: Very easy
- Warning signs: Visible dirt accumulation, reduced airflow, dusty air from registers
Fan Motor:
- Expected lifespan: 5-10 years depending on usage
- Replacement schedule: When symptoms appear or preventively after 8-10 years of heavy use
- Cost: $60-$150 for motor, additional $150-$300 for professional installation
- DIY difficulty: Moderate
- Warning signs: Unusual noises, reduced airflow, intermittent operation, complete failure
Fan Blades:
- Expected lifespan: 8-12 years
- Replacement schedule: When cracked, warped, or damaged, or with motor replacement
- Cost: $20-$40
- DIY difficulty: Easy to moderate
- Warning signs: Unusual vibration or noise, visible cracks or warping
Thermostat/Control Panel:
- Expected lifespan: 7-15 years
- Replacement schedule: When malfunctioning or when upgrading features
- Cost: $30-$300 depending on features
- DIY difficulty: Easy to moderate
- Warning signs: Erratic behavior, incorrect temperature readings, unresponsive controls
Control Board:
- Expected lifespan: 10-15 years
- Replacement schedule: Only when failed
- Cost: $100-$250 plus installation
- DIY difficulty: Moderate to difficult
- Warning signs: Complete system failure, erratic operation, no response to thermostat
Gaskets and Seals:
- Expected lifespan: 5-8 years
- Replacement schedule: Every 5-7 years preventively or when air leaks detected
- Cost: $20-$50 for complete re-sealing
- DIY difficulty: Easy
- Warning signs: Visible degradation, air leaks felt during operation
Housing and Covers:
- Expected lifespan: 10-20 years
- Replacement schedule: Only when damaged
- Cost: $15-$200 depending on component
- DIY difficulty: Easy
- Warning signs: Cracks, breaks, UV damage, warping
DIY Maintenance vs. Professional Service
Deciding whether to perform maintenance yourself or hire professionals involves evaluating complexity, available time, tool requirements, and your comfort level with mechanical and electrical systems.
Best suited for DIY:
Filter replacement stands as the quintessential DIY task that every RV owner should master. The process requires no tools, takes under five minutes, and dramatically impacts system performance. Filter access is intentionally designed for easy owner service, typically involving removing a snap-in grille or cover. Following filter replacement guidelines saves money while ensuring optimal air quality and system protection.
Cleaning and basic maintenance including housing exterior cleaning, register cleaning and adjustment, visual inspection